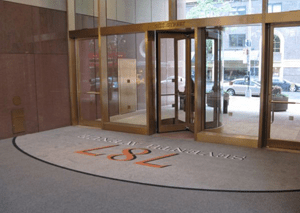
Wall-to-Wall Installation
When your customized commercial floor matting covers a large area — like from one wall to another — you must take extra care to install it correctly. Make sure your matting looks its best by following these steps.
Simple Installation
- Before you begin, unroll your mat and lay it flat for 24 hours.
- Check the dimensions of your room versus the dimensions of the floor mat to ensure that the mat is big enough to cover the entire room. Your Matting By Design custom floor mat has been crafted to your specifications, so it should fit perfectly. We’ll design your mat with a few extra inches on all sides so you can easily trim it to fit all walls.
- Sweep and mop the floor surface.
- With yarn side up, lay out the mat in the center of the space.
- If you’re installing Ultra Dry matting, you’ll see that it has a ribbed pattern. Check the specs to make sure the ribs are positioned in the correct direction. If there is no pattern, any direction will work.
- Use a sharp utility knife to trim the mat so it fits into place.
- Using a carpet wedge, tuck the mat tightly into the corners of the walls and cut on the yarn side, using the wall as a straight edge to push against your knife blade.
- Make sure the mat is lying flat; then vacuum it.
Logos and Designs
- If your mat has a logo or design, measure to ensure it is properly placed in your space. Some are meant to be centered, while others are designed to be offset.
- In a wall-to-wall installation, check the size of the vestibule to make sure the mat is oversized correctly and that the mat extends an equal length on all four sides.
- Verify that the design or logo is running straight or parallel to the front wall, or in the direction specified by your application.
Recessed Areas
- First remove any plastic or metal grates from the recessed area; then clean and scrub the area.
- If your mat has a logo or design, align it so that the mat overhang is equal on all sides of the recess. Use a tape measure to properly align the logo.
- Recessed mats are usually in a square or rectangular area that’s bordered by ceramic or natural stone tile with a metal edge. Cut the mat to the metal edge.
- If there is no metal, the edge of the tile creates the edge of the recessed well. Cut the mat to that line.
Thresholds
- If your mat edge touches a square or vertical door threshold, cut it tightly to the threshold edge.
- If your mat edge touches a tapered threshold, you will need to apply a beveled rubber or PVC edge to terminate the mat edge at the threshold.
Odd Shapes
- For odd-shaped areas, unroll the mat in the area and measure to ensure that equal lengths of the mat extend on all sides.
- Make sure the logo or design is properly centered or aligned to your specs.
Your properly installed commercial floor matting will make an impressive statement while protecting your flooring. For additional information, visit our FAQ page and download the Matting By Design Owner’s Manual. As always, you can contact your Matting By Design experts at 800-468-0860 or email dwolfe@mattingbydesign.com.

